Hello! My name is Katie and I blog over at Running A Ragnar- a health and lifestyle blog. I also have a passion for restoring and creating old furniture. I wanted to share my tutorial on building a headboard and Michael was nice enough to let me guest post it here!
There is something really sad about a bed without a headboard.
First off, your pillows are constantly falling behind the bed, if you lean up against the wall it is so uncomfortable and the bed moves, and lets be honest- it just looks like a dorm room without one.
With all that being said, headboards are very expensive. If you look online, a fun padded headboard in a nice print will run you at least $200.
But what if I told you you could make one in one night for under $50? You would run to Lowe's with your supply list and get to work.
But what if I told you you could make one in one night for under $50? You would run to Lowe's with your supply list and get to work.
Supply List: From May Richer Fuller Be
- Two 10' 2x4s cut down to four 54" lengths (HD or Lowe's will do this for you for free)
- One 7/16" 48"x96" (4'x8') OSB sheathing(plywood) cut down to 62"x48" (62" wide for a queen sized mattress)
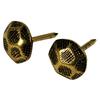
- About 40 1" panel nails (I bought these)
- Hammer
- 1" twin foam mattress topper
- Measuring tape
- Serrated knife
- Painter's tape (or any other kind of tape)
- Fairfield Extra Loft Bonded Polyester Batting Quilt, King
- One 54"x84" curtain panel (I bought the Threshold Shell Print Window Panel in coral)
- I used 2.5 yards of farbic instead of the curtain panel but the curtain will cover better and be cheaper
- Scissors
- Staple gun
- Staples
- Studs if you want to trim the headboard- buy 6 packs (at least!)

You will use all of the 2x4, but will have leftover plywood. I also carried all this wood into the car and into the apartment on my own. Proud Moment.
Depending on the size of your mattress, the width of the headboard will change, I suggest adding two inches to the overall width of your mattress to make sure it is the right size in width. Here is a chart that will help you determine the width you need for your headboard. remember, the measurements are (width X length) and you need the width measurement, the height should be the same for most beds.

Foam is really expensive at the crafting store ( I use JoAnn Fabrics). For a lot cheaper, you can just stop at Walmart and pick up a foam mattress pad for $9.99.
I picked up the batting at JoAnns. I only got 2.5 yards but I would double it so you can cover the bottom as well and maybe even an extra layer on top. Batting is cheap and you can always find coupons on their website.
I couldn't pick a fabric to save my life. I ended up with these two but when I got home, I noticed I didn't love how small the prints I picked were. I ultimately picked the navy green design but I recommend finding a fabric with a bigger print.
Make sure you iron the fabric before stapling it onto the headboard- Nothing is worse than large pleated folded lines in the middle of your headboard. On that note... make sure you line up the pattern nice and straight when tacking it on.
I liked it without studs, but I thought the trim would be a nice little touch.
My neighbors probably hate me- and I didn't get it as straight as I would like (and could not find my rubber mallet) but all in all- the trim is another fun element on this DIY headboard.

Buy extra nails/tacks.
I ran out and had to go back out to Lowes (as you can see in the picture below).

I am really happy with the finished product. It took me one night, just under $50 for supplies (always look for JoAnn coupons). It adds some fun color to the room, blocks off the window, and prevents my pillows from falling back.
By putting this one on legs, you do not have to figure out how to drill it into the wall, another plus for someone renting like me. Even if you do own your own, putting it on legs and not having to drill it into the wall or bed just makes life easier.


